Follow these steps to add and customize statuses for your property or contact records.
Step 1: Open the Statuses Page
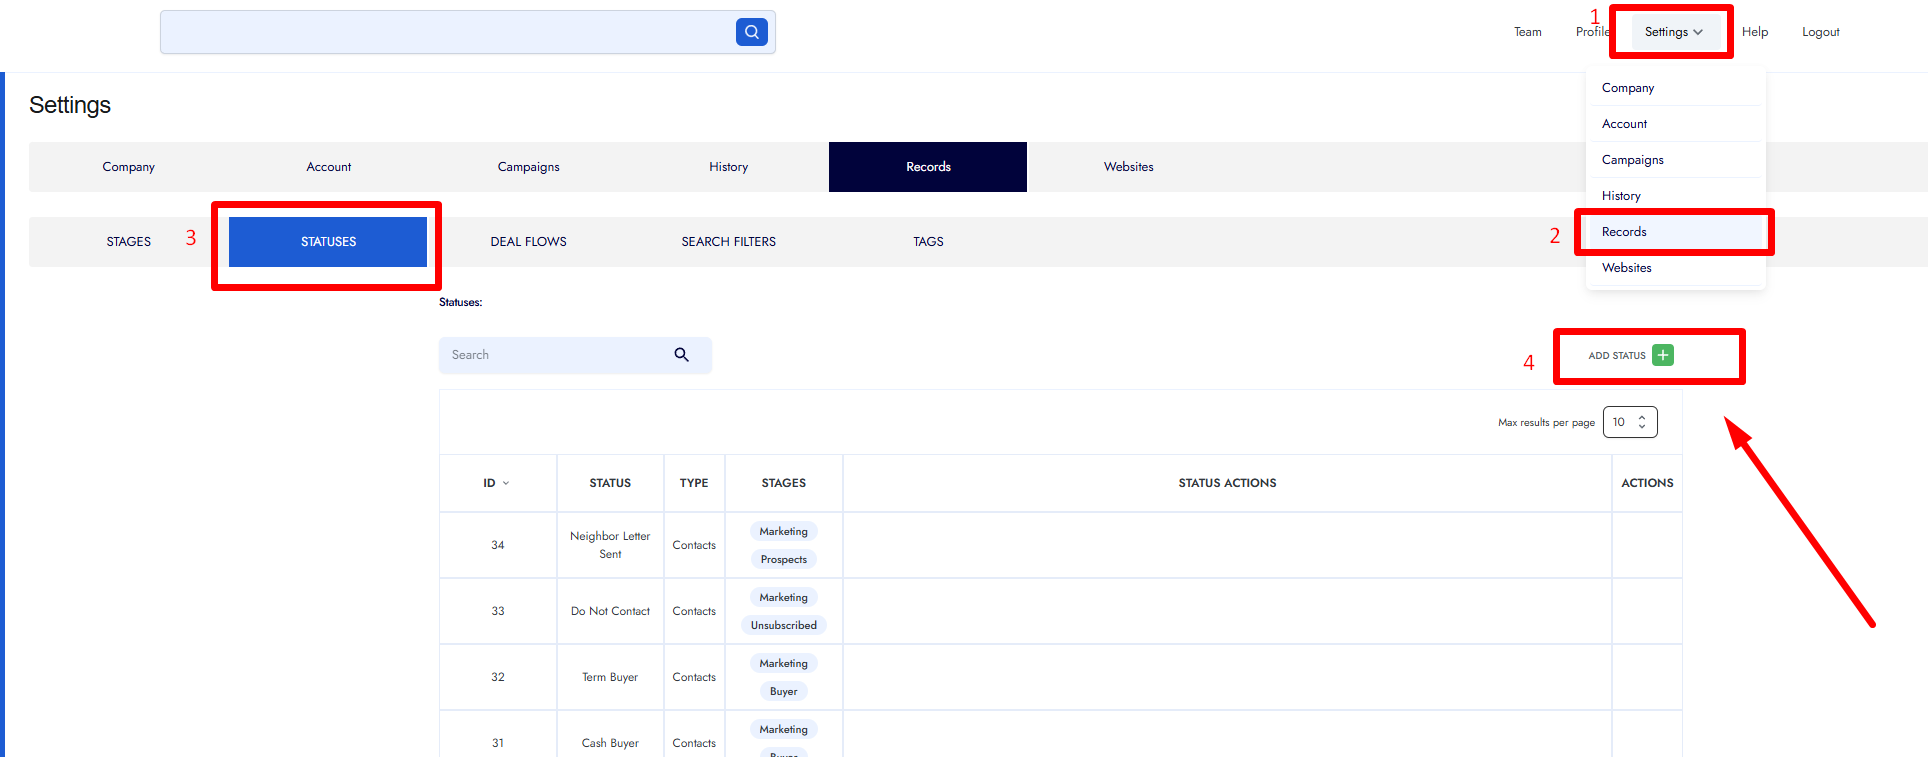
• From the home page, go to the top right.
• Hover over Settings.
• Click Records.
• Select the Statuses tab.
Step 2: Add a New Status
• Click the Add Status button in the top right (green button).
• Set Status Type:
• Choose Properties if the status is for property records.
• Choose Contacts if the status is for contacts.

Step 3: Configure the Status
• Enter the Status Name (example: Letter Sent).
• Choose a Stage. For neutral letter workflows, select Prospect.
Step 4: Select Status Actions
You can assign actions that become available when a record reaches this status, such as:
• Market Research
• Calculate Offer Amount
• Generate Documents
• Generate Listing
• Payment Calculators
• Search Property Location
• Other available actions
Select the actions you want this status to trigger.
Step 5: Save the Status
• Click Add Status (green button at the bottom right).
• Your new status is now active and can be applied to any record.