Follow these steps to create and manage your own custom letter templates.

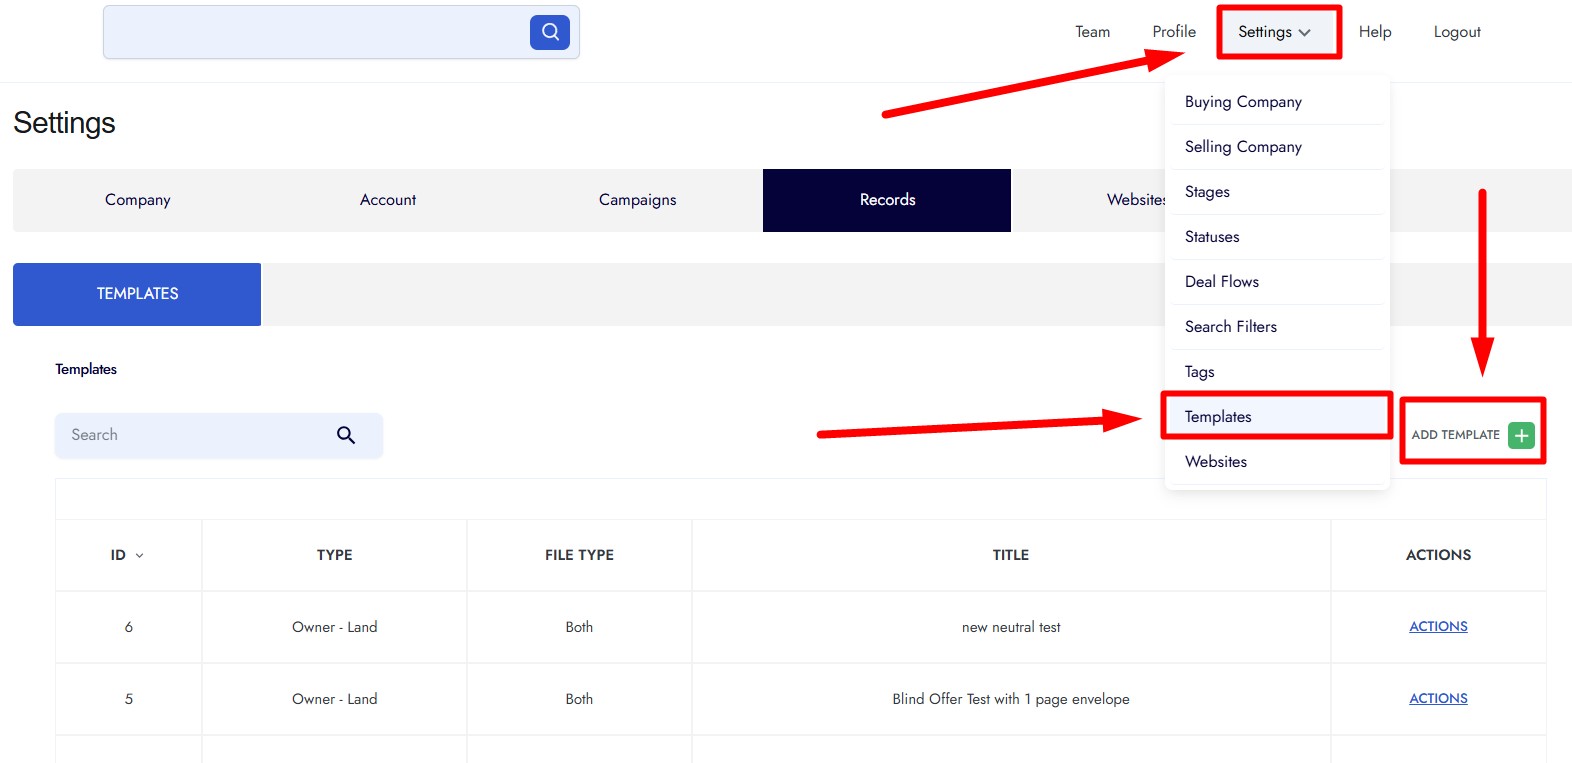
1. Access the Templates Section
- From your Home Page, hover over Settings in the top-right corner.
- Click Templates.
- You will be taken to the Templates for Record page, where all existing custom documents are listed.
2. Add a New Template
- Click Add Template in the top-right corner.
- Enter a Title for your document, such as Custom Neutral Letter.
3. Define Template Details
- To: Select the target audience (commonly Owner or Lien Only).
- File Type: Choose between PDF or DOC format.
- Recommendation: Use PDF for printing or DOC for editing.
- Layout: Select Portrait, which is standard for letters.
4. Add Content
- In the Content field, write or paste your letter text.
- You can:
- Adjust wording and formatting.
- Insert images or your company logo.
5. Configure Optional Settings
- Allow Generate Envelope Label:
- Choose Yes to enable label generation.
- Then select Standard or Large envelope size.
- Allow Bulk Update:
- Choose Yes if the purpose is to allow bulk updating of the records after generating the documents for it.
- Allow Export Data:
- Choose Yes to make the document exportable.
- Per Each Property:
- Enable this if you want to generate the letter for each property in your system.
6. Save and Use the Template
- Once all settings are complete, click Add Template.
- Your new template will now appear in the list.
- You can use it in:
- Mail campaigns
- Document generation within the system
Notes
- Review your letter’s formatting before finalizing.
- Test with one record before using it for bulk mailing.
- Use PDF for consistent printing results.