Deal flows outline the sequential steps a property record moves through from start to finish. In the Investment Dominator, from start to finish and in the Investment Dominator, you can create and define custom deal flows to measure and track the movement of a property through your deal cycle. This article will show you how.

Creating A Custom Deal Flow
As an example, in this article let’s design a custom SMS marketing deal flow in the system. But first, let’s take a moment to define what record stages and statuses we would need our property record to move through in order to complete this custom deal flow from start to finish.
In our example SMS marketing campaign, a record might move through these record statuses:
- Prospect
- SKIP TRACE
- Send SMS
- Pending Preliminary Research
- Offer Sent
- Open Escrow – Detailed Research
- Complete – Ready to Sell
- SOLD
Notice that the Send SMS status is highlighted. This is because this status does NOT come pre-loaded in your system, it is a custom status that needs to be created. More about custom statuses here.
Ok, now that we’ve defined the structure of our custom deal flow let’s set this up in the system!
How To Add A New Deal Flow
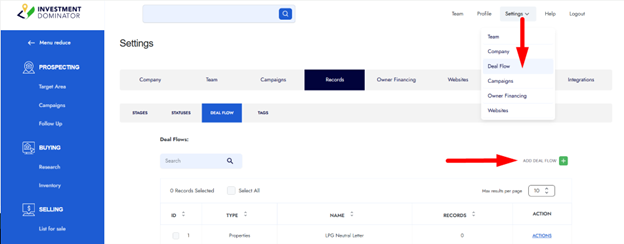
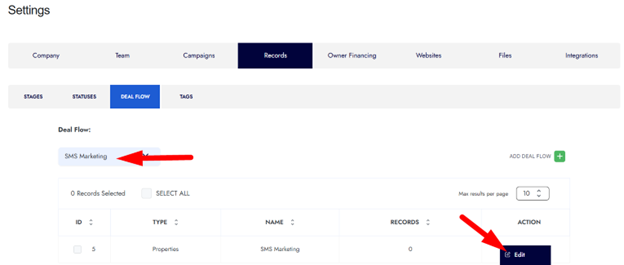
Step 1: Navigate to ‘Settings> Deal Flow‘ and click the ‘‘’ADD DEAL FLOW‘ option:
Step 2: Let’s define this new deal flow by answering a few questions. In this case we want to build out a deal flow for property records in the system:

Let’s give it a name of “SMS Marketing” for now, but you can name it whatever you want:

Take a moment to write a description of your custom deal flow:

Click the ‘NEXT‘ button to continue with the wizard:

Step 3: Your deal flow is made up of Stages and Statuses that your property or contact records move through in order to complete a full deal cycle.
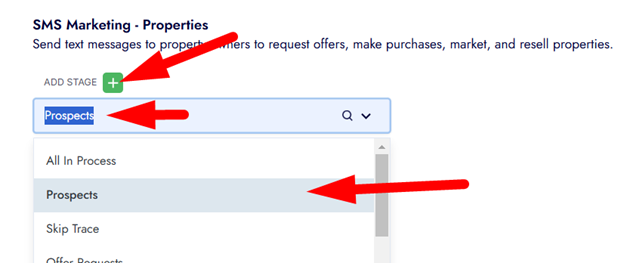
Click the ‘ADD STAGE‘ option to add the record stage that your property will need to be in, to start this deal flow. In this example we will select the “Prospects” stage first:
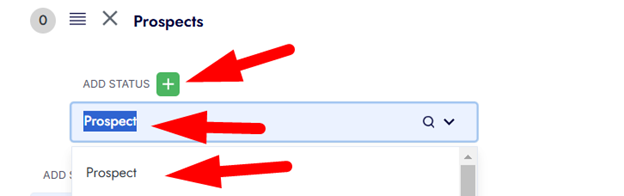
Step 4: Once you add a stage click the ‘ADD STATUS‘ option to add a record status to that stage. In this example add the “Prospect” status to the “Prospects” Stage that we added in step 2:
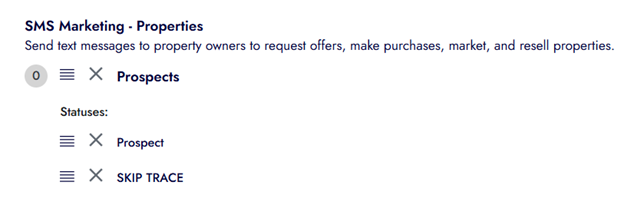
Step 5: Now when we get data from the county, we typically don’t have the owner’s phone number. To get a number that we can send our SMS to, we need to add a Skip Tracing step to our deal flow.
Let’s add this new step as a status under the “Prospects” stage. Click the ‘ADD STATUS’ option just as you did in step 3 and add the “SKIP TRACE” status. You’re deal flow should look like this at this point:
Step 6: Repeat steps 3 through 5 and add all your Stages and Statuses until you have built out a complete linier hierarchical structure that your property record can move through
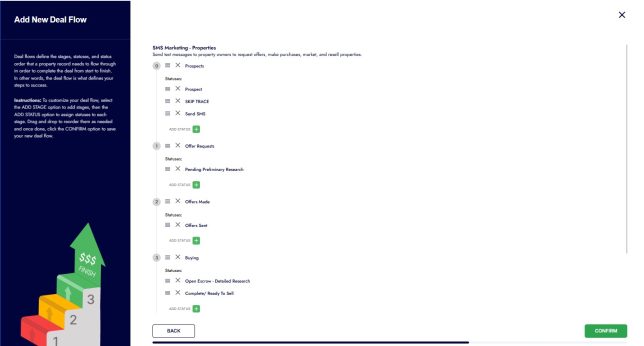
Step 7: Click the ‘CONFIRM‘ button to save your new deal flow.
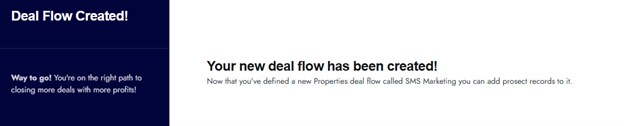
A confirmation screen should appear –letting you know your deal flow has been created and defined in your system:
You can come back and modify or adjust this custom deal flow at any time. To do this simply navigate to ‘Settings> Deal Flow‘ and do a search for the name of your deal flow using the search option, then click ‘ACTIONS> Edit‘ next to your custom deal flow:
Now that you have this new Deal Flow saved in the system, you can add property records to it and start tracking them as they move through.