
This guide walks you through how to upload and manage pictures for a property listing in Investment Dominator. Adding images to your listings helps improve presentation, makes properties more appealing to buyers, and ensures your selling website displays accurate visuals.
By following the steps below, you’ll be able to upload images, set a featured photo, and control which images are publicly visible.
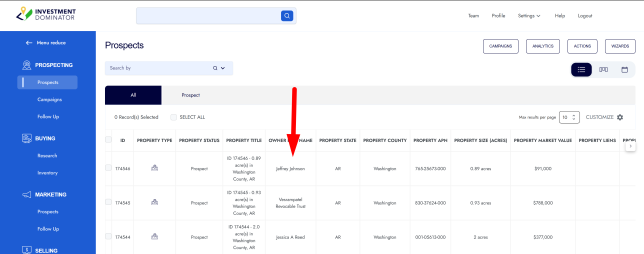
Step 1. Open the Property Record
- Locate the property record you want to update.
- Click on the record to open the property details page.
This will take you into the full record view for that specific listing.
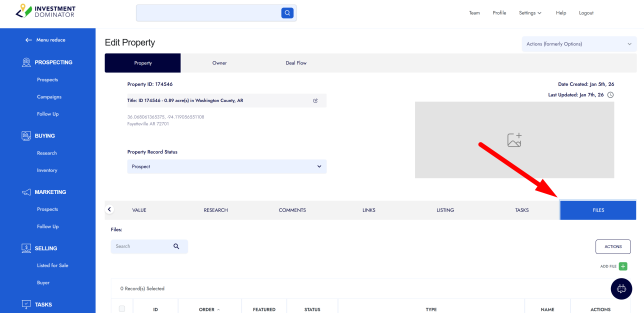
Step 2. Navigate to the Files Section
Inside the property record:
- Use the arrow navigation within the record to move through the available sections.
- Continue clicking until you reach the Files section.
The Files section is where all documents and images related to the property are stored.
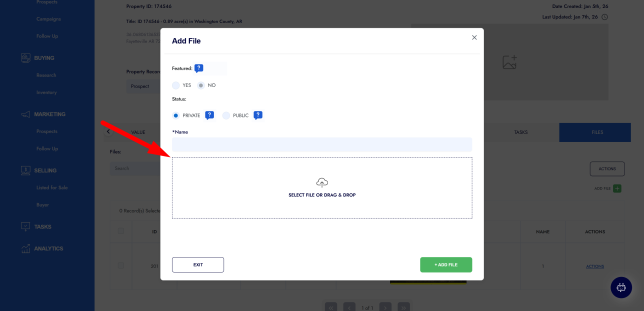
Step 3. Add a New Image File
- In the Files section, click Add File.
- Select the image from your computer.
- Once selected, configure the file settings:
- Make Public – Required for the image to display on your listing
- Feature Image (optional) – Sets this image as the main photo shown at the top of the listing
- File Name – Enter a clear name (e.g., “Property Image 1”)
Step 4. Save the Image to the Listing
After configuring the image options:
- Click Add File.
- The image will now be uploaded and attached to the property record.
- If marked as public, it will automatically appear on the listing.
- If featured, it will display as the primary image.
Best Practices for Listing Images
- Upload clear, high-quality images whenever possible
- Use the Feature Image option for the most representative photo
- Name images clearly for easy organization
- Always ensure images are marked Public if you want them visible to buyers