In this guide, we’ll show you how to update the ‘Edit Property > LISTING‘ section in Investment Dominator to create and publish a property listing on your Selling website. While tools like the AI Copilot can help you craft compelling headlines and descriptions, this article focuses on where to enter and save that information within the system.
Let’s dive in…
Step 1: Access the Listing Section
- Navigate to your property records under the ‘PROSPECTING‘ section.
- Use the navigation tabs or Quick Search option to find and select the property you wish to list.
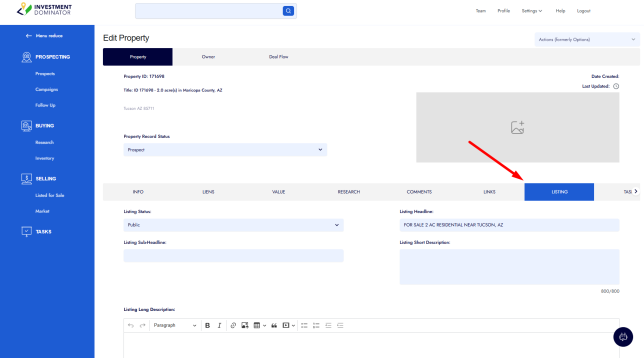
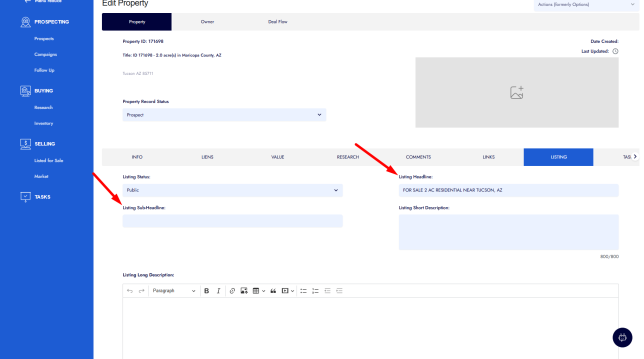
- Click on the ‘LISTING’ tab within the property record.
Here, you’ll find several fields to fill out. We’ll go over each one in detail below.
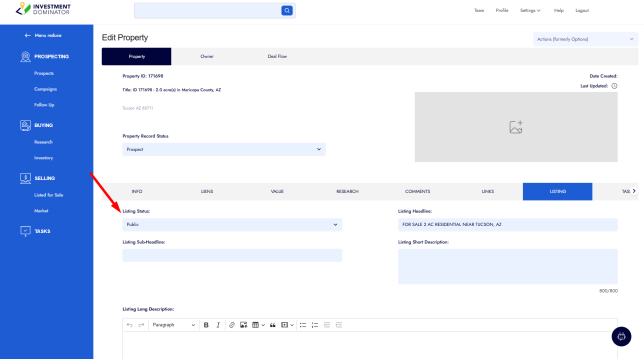
Step 2: Set the Listing Status
The Listing Status determines whether the property appears on your Selling Site.
- Public – The property will be listed and visible on your website.
- Private – The listing will be hidden from your site while you’re still preparing it.
🔒 Tip: Set the status to Private while editing your listing, and switch it to Public once everything is ready to go live.
Step 3: Create a Compelling Listing Headline and Sub-headline
- Listing Headline – This is the main title for your property. Think of it as the attention-grabber.
Example: Own this 2-Acre Residential Lot For Sale Near Tucson, Arizona for just $5K Down/ $300 per mo.! - Listing Sub-headline – Optional, but adds supporting information and a space to add more compelling copy.
Example: This vacant parcel offers expansive mountain views, peaceful desert surroundings, and proximity to hiking and local amenities — a beautiful setting for future opportunities
🎯 Pro Tip: Highlight key amenities in the area or unique selling points of the property.
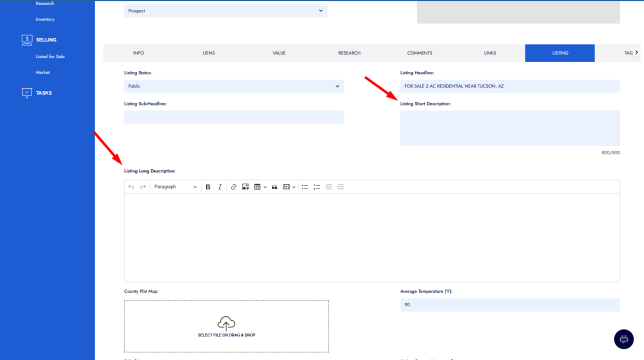
Step 4: Write a Short and Long Description
Listing Short Description – A brief overview of the property and its key features. This short description is great for use on your overview pages, search engines, or social media ads. Ideally keep this description less than 150 characters and text only (in paragraph form).
Example: 2-acre desert parcel near Tucson with mountain views, nearby hiking, and easy access to local amenities—peaceful setting with great potential.
Listing Long Description – Provide detailed information about your property and surrounding area, including nearby amenities, possible uses, zoning details, and key benefits. You can use basic HTML to format your description with bullet points and emojis, creating a balanced and visually engaging layout. The goal is to include enough information for the prospect to be well-informed while keeping it simple and interesting enough for them to read all the way through.
Example:
Discover the beauty and serenity of the Arizona desert with this spacious 2-acre parcel located just outside Tucson. Enjoy stunning mountain views, peaceful surroundings, and easy access to outdoor recreation—all while staying within reach of modern conveniences.
Property Highlights:
- 2.05 acres of open desert landscape 🌵
- Breathtaking mountain and sunset views 🌄
- Nearby hiking, parks, and nature areas 🥾
- Short drive to shopping, dining, and services 🛒
- Easy road access and flexible use potential 🚗
Whether you’re seeking a long-term land investment, a recreational retreat, or a future opportunity to develop and build, this parcel offers both space and simplicity in one of Arizona’s most iconic settings.
🤖 Time Saver: Open the AI Copilot while on these screens to have it instantly write your headlines and descriptions in seconds — you can even ask it to generate multiple versions for you to choose from!
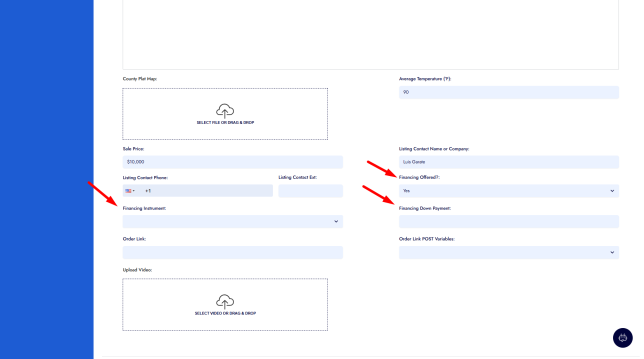
Step 5: Add County Plat Map
If available, download the plat map from the county assessor website and upload it under the ‘County Plat Map‘ section.
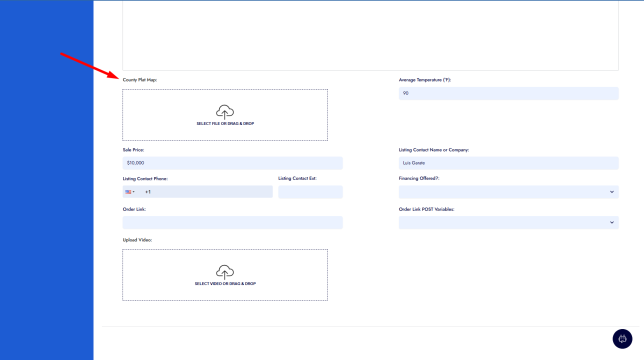
🧭 Posting the official plat map adds credibility and completeness to your listing while saving prospects time as they conduct their due diligence.
Step 6: Enter Additional Listing Details
- Average Temperature – Enter the average temperature in Fahrenheit (e.g., 90°F).
- Sale Price – The price you want to sell the property for (e.g., $10,000).
- Listing Contact Name or Company – Who should buyers contact? Enter your name or your business name and sales rep, or an agent/broker that you have listed the property with.
- Listing Contact Phone – Include a valid phone number.
- Extension – If applicable, add the extension for the contact number.
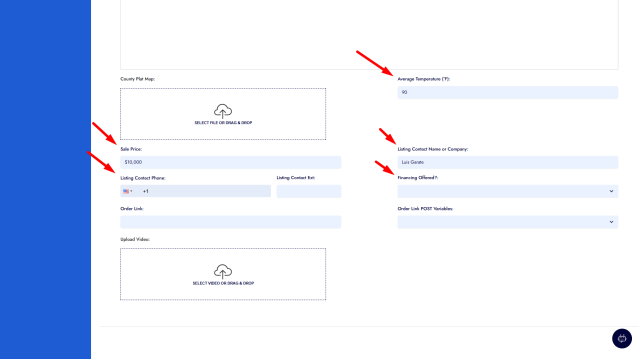
Step 7: Financing Options
- Offer Financing? – Select ‘Yes’ or ‘No’.
If you select Yes, you’ll need to fill out:
- Financing Instrument
- Required Down Payment
If No, these fields will not appear on your listing.
Step 8: Customize The Order Link and Add a Video
- Order Link – This should be the URL to your order form or checkout page.
- Order Link POST Variables: Add any variables that you need to post to your order form or checkout page (e.g. propertyid=[property-apn]&price=[property-sale-price]&sku=[property-id]
- Listing Video – Upload a video to visually showcase your property.
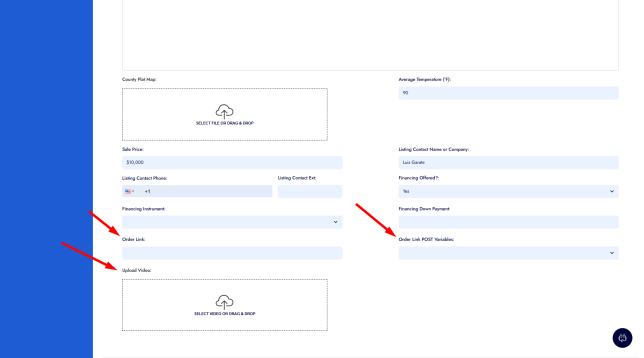
🎥 A video can significantly improve buyer interest. Even a simple slideshow with a voiceover works great!
Step 9: Make the Listing Live
Once all fields are filled out:
- Scroll back to the top of the Listing Section.
- Change ‘Listing Status‘ to ‘Public‘.
✅ Your property is now live on your Selling Site!
Final Thoughts
While only a few fields are required to list a property, completing as many fields as possible creates a more compelling and professional listing. This can lead to faster sales and more qualified buyer inquiries.
If you need help with descriptions, images, or video content, open the AI Copilot from any one of the ‘Edit Property‘ screens and simply ask it to assist.